I’m a big fan of using a very simple user interface for writing. It helps clear the mind.
I generally draft articles using Typora, and have increasingly turned to markdown format for my articles. When I’m ready to publish, I copy and paste them into my WordPress-powered blog. Since I work on both Mac and Windows, I like to keep my draft articles on a personal OneDrive, and then I can edit them on either a laptop or desktop when I want to.
With this system, adding text, heading, formatting and tables works really well, but images are one thing that doesn’t quite work out-of-the-box. That’s because as you write, Typora will save a pasted image locally to your hard disk, but when you go to paste it into WordPress, the links will of course still point to local files. That obviously will break these images when posted. Now, you can manually go through and upload them all, but that’s a hassle when it it comes to publish-time.
Luckily, Typora has a great feature which lets you customize what happens when an image is pasted into the editor. We’ll use this feature to tell it to call a utility called “upgit” to upload the image to a service provider.
Oh, and I’ve chosen Github to host these images — because they let you put a lot of stuff up there for free — but upgit supports a bunch of other image-hosts as well.
Upgit to the Rescue
Go to pluveto/upgit on Github to download and install the version appropriate for your operating system. There’s a configuration file you need to create in the folder you put it in.
I have a Mac and a Windows machine.
On my Mac, I put upgit into the /Applications folder. On Windows, I have a single folder I use for utilities, called “/bin”. I created a folder, “/bin/upgit” and placed the upgit executable in that folder.
If you’re a Mac user, you’ll need to rename your download to simply “upgit”, and then do the following, to make it executable:
chmod 701 upgitYou’re almost done, but you also need a config.toml file (the repo gives an example), which at a minimum needs your Github username and Personal Access token, and the name of the repository to which to save images. I created a public repo called “media” to save the media.
Once you’ve got upgit configured to upload images from your local directory, all you need to do is tell Typora to call out to “upgit” when an image is pasted into the file. To do this, go to Typora > Settings:

Go to the “Images” panel, and set the values as indicated here:
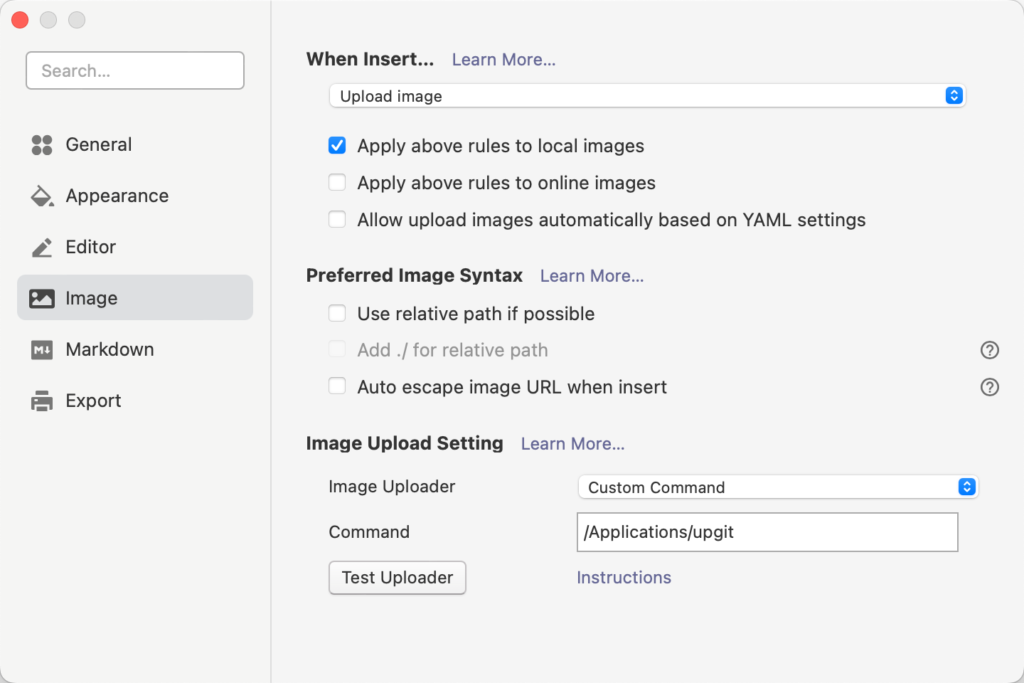
Voila! Now, when you paste in an image from the clipboard into Typora, there’s a very short delay and it automatically (1) uploads the image to your Github repo and (2) changes the link reference to that remote image! Fantastic. Simple, and (with the exception of the affordable Typora pricetag), free.