
Turn a Raspberry Pi into a Web Server with Its Own Wifi Network (Tech Note)

The Raspberry Pi (RPi) microcomputer is great for building fairly cheap “Internet of Things” devices. I say “fairly” cheap, because there are other microcontrollers, like ESP32 and those based on the Arduino platform, that are even cheaper.
In this tech note, I outline how to set up a Raspberry Pi device so that it broadcasts its own local wifi network, so you can join it from a mobile phone. From there, you could launch a web browser and point it at the RPi’s website, which in turn controls the board’s I/O devices. This means you could use a mobile phone or tablet and a Raspberry Pi device, and control the Raspberry Pi without any larger Internet connection.
The steps below also essentially turn the RPi into a “wifi access point,” which basically can take a hardline Internet network (LAN) and present a wifi front-end (WLAN.)
So how do you get a Raspberry Pi to create its own wifi network? There are several “How To’s” on the web, but nearly all of them I followed are out of date. You need to install a few services, set up some configuration to define your network, and then reboot the Pi once everything is all set.
One great use-case is to build a standalone device which can be controlled via a web interface from, say, a mobile device. RPi’s can easily run web servers like Apache, so once you set up an RPi to broadcast its own private wifi network, you can easily interact with the Raspberry Pi’s devices and sensors via your website.
You’ve probably seen this kind of behavior if you’ve set up a wifi printer, or smart switch, or wifi security camera. These devices often have modes where they broadcast their own local wifi network, then you use a browser or a configuration app to “join” it, you do some setup process, and then it in turn uses what you’ve input to restart and join your home network with those configuration details thus supplied.
Enchanted Rose Prop 2.0
I had a use-case for this “ad hoc networking” with a stage prop I’m building.
A few years ago, I built an Enchanted Rose prop for my daughter’s school production of “Beauty and the Beast.” It let the stage manager drop petals and turn on lights on queue. It was based on Arduino and Bluetooth. I blogged the instructions in a two-part series. As a result thanks to Google, every couple of months or so, I get an inquiry from a production manager from somewhere in the world who wants to know more about how to build such a prop. Invariably, they follow these instructions and then hit a dead-end (which I’ve now noted in the posts.) The problem is, the version 1.0 device that I built is based upon an Arduino microcomputer (fine) with a Bluetooth add-on board which is now discontinued (not fine.) Worse, its controller was a proprietary Swift app which I wrote in a many-years-out-of-date dialect of Swift, which had to be installed straight from XCode onto a machine, as I opted not to publish it in the App Store. Apple has made many changes to Swift since then. The app as originally written no longer compiles, and Apple itself make it very difficult to distribute “one off” apps to people. (You can’t just post the app download somewhere, or email them a link — Apple requires that the developer add the person to an ad-hoc distribution list.)
So I began to think about how to rebuild it in a more open-source way.
Motivation for Ad-Hoc Network
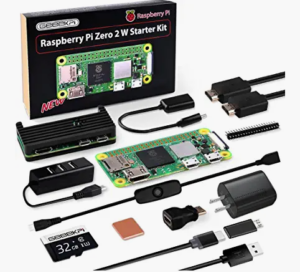
At the heart of the version 2.0 of this prop is a Raspberry Pi Zero 2W, which runs its own little Apache web server to control lights and the falling petals. Ideally, a stage manager would simply need a mobile phone or iPad or some kind of web browser on a device equipped with wifi to communicate with the prop.
I’ve heard interest in this prop from stage managers in the UK, California, Colorado, Texas and more, and I wanted to re-build this prop in a more robust, even shippable way. So on the mechanical front, instead of using delicate springs and fishing line, it now uses pumps and air to push the petals off the rose. I’ve got the motors and circuits all working fine. Before moving on to the final aesthetics, I’m now working through matters related to the deployment setting(s) this prop will run in.
There’s a high school in California putting on this play in March. I don’t know what network environment is at that school, nor should I particularly care. I certainly don’t want to request and configure wifi passwords for the prop to “join” before shipping the device out. Rather than equip the prop with some kind of user interface to allow it to “join” the local WAN (needlessly wasteful screen and keyboard and instructions), it’s far better for it to broadcast its own tiny network, and be controlled from backstage just on its own. You’ve probably seen this type of “ad hoc” network when setting up, say, a printer or security camera, smart speaker, or smart switch.
But wow, getting ad-hoc networking up and going in Raspberry Pi is complicated!
THAR BE DRAGONS. It has taken a full day to get this up and running. Not only is Linux itself pretty arcane, but a much bigger problem is that so many of the instructions on ad-hoc networking for Raspberry Pi’s are wildly out of date. The Raspberry Pi Foundation changes these methods seemingly with every release of the OS.
So, to save my future self (and anyone Googling who lands here) many headaches… After much tinkering, the following instructions successfully configured a Raspberry Pi Zero 2W device to create and broadcast its own wifi network with a password. It allows clients (such as mobile browsers) to join it, and visit its control webpage hosted by the device on its Apache server. In short, the below just plain worked for me. Many, many other “how-to’s” on the web did not. A day wasted; I don’t want to do that again.
After you complete the below, you should be able to use a wifi device and “join” the network that the Raspberry Pi broadcasts. I successfully did so from both a Mac desktop and an iPhone. I could also then visit the apache page hosted on the Pi from these devices. This opens up a world of possibilities for “build and deploy anywhere” devices.
The notes which follow are adapted from: documentation/access-point-bridged.adoc at develop · raspberrypi/documentation (github.com)
There are a lot of steps here, but once you’re finished configuring your RPi, it should have its own private wifi network, and yet still be connectable via Ethernet. This is called an “Access Point” configuration.
Prerequisite: Use Raspbian “Buster,” a prior version of Raspbian OS
[EDIT: Below is my original post’s caution to use “Buster”, but since publication date, commenters ARE reporting this method works with Bullseye.]
Make sure you use Raspbian “Buster” for the instructions. “Buster” is not, in fact, the most current version of the OS.
For the instructions below to work, you must use the older “Buster” version of Raspbian. Let me repeat, because some of you will be very tempted to use the latest version of Raspbian OS, and then will wonder why the network isn’t showing up. The Ad-hoc networking steps described below have only been tested to work on the “Buster” version. In fact, I tried and failed to get them to work on the latest (“Buster”) version of Raspbian OS. Perhaps I did something wrong; perhaps by now it’s all resolved. But I tried twice, and only “Buster” worked perfectly.
The Raspberry Pi Foundation is great, but it’s pretty frustrating that they’re constantly tweaking the network setup code and drivers. There. are so many web pages which refer to old versions and drivers. (One clue you’re looking at an outdated how-to: if you see mention of “/etc/network” or the “interfaces” file. This method is discontinued and you’ll see no mention of it below.)
If you are dedicating your Raspberry Pi to its own ad-hoc network, I highly recommend you start over with it, back up whatever files you have on the SD card, and then use the Raspbian OS imager to create a bootable card with a fresh copy of Raspbian OS “Buster” on it. So, grab an archived copy of Buster. Unzip it. Then, launch the Raspberry Pi Imager, and click the GEAR icon to:
- ENABLE SSH with a password, and
- Set it up with your home wifi’s network name (SSID) and password.
After your card is written, you should be able to pop it out and put it in your RPi, and turn on the device. After a few moments, you should be able to ssh into it (Mac) or use PuTTY (Windows) to connect. To find the device’s IP address, go into your wifi’s router and look for a recently joined Raspberry Pi device. (Generally, the IP address will be the same from session to session.)
For Mac OSX, this looks something like:
ssh pi@192.168.x.y
where x and y are numbers. Every Internet device connected to your wifi is assigned a different address; this will vary from device to device. The default password for “pi” is “raspberry”.
Later in these setup instructions, we’re going to have it create its own wifi network with its own subnet, and connect on the backend with Ethernet. This is called a “Wide Area Network Access Point” or “Wifi Access Point” configuration, in which the RPi will basically have two IP addresses: one over the wire, and the other wireless.
1. Set up “root” user
Instead of the default user “pi”, for some operations you may need root access. For instance, NeoPixel libraries need Raspberry Pi “root” permission to run. So it’s best to set up a root user password first thing:
sudo passwd rootThen, log out of ssh and log back in with ssh root@<ip address>
From here on, you’ll want to sign in as root.
Enable remote login for the “root” user
sudo nano /etc/ssh/sshd_config- Find this line: PermitRootLogin without-password
- Change to: PermitRootLogin yes
- Close and save file.
- reboot or restart sshd service using: /etc/init
2. Get web server running
Install Apache2 Web Server with one line of code:
sudo apt install apache2 -yThis will create a folder in /var/www/html which the Apache web server will run. The install will also ensure that it starts at boot time.
3. Set up Ad Hoc Networking
OK this is the crucial part. HAVE PATIENCE, and follow this closely. (Full notes are at this Github location.)
Setting up a Routed Wireless Access Point
We will want to configure our Raspberry Pi as a Wireless Access Point, so that it broadcasts a wifi ssid, and so mobile devices can connect to it. Ideally, the RPi would also remain connectable to an Ethernet network for development purposes, to install new libraries, etc.
So a “Routed Wireless Access Point” is perfect for our needs.
AGAIN, BE SURE YOU ARE WORKING ON RASPBIAN “BUSTER”, NOT “BULLSEYE” OR LATER. (UPDATE: SEE THE COMMENTS — PEOPLE ARE CONFIRMING THIS WORKS ON BULLSEYE.)
You can find out what OS version you’re running with the following command:
cat /etc/os-releaseA Raspberry Pi within an Ethernet network can be used as a wireless access point, creating a secondary network. The resulting new wireless network (called “Enchanted Rose” in my case) is entirely managed by the Raspberry Pi.
A routed wireless access point can be created using the inbuilt wireless features of the Raspberry Pi 4, Raspberry Pi 3 or Raspberry Pi Zero W, or by using a suitable USB wireless dongle that supports access point mode. It is possible that some USB dongles may need slight changes to their settings. If you are having trouble with a USB wireless dongle, please check the forums.
This documentation was tested on a Raspberry Pi Zero W2 running a fresh installation of Raspberry Pi OS Buster.
Before you Begin
- Ensure you have root access to your Raspberry Pi. The network setup will be modified as part of the installation: local access, with screen and keyboard connected to your Raspberry Pi, is recommended.
- Connect your Raspberry Pi to the Ethernet network and boot the Raspberry Pi OS.
- Ensure the Raspberry Pi OS on your Raspberry Pi is up-to-date and reboot if packages were installed in the process.
- Take note of the IP configuration of the Ethernet network the Raspberry Pi is connected to:
- In this document, we assume IP network
192.164.4.0/24is configured for the Ethernet LAN, and the Raspberry Pi is going to manage IP network192.168.11.0/24for wireless clients. - Please select another IP network for wireless, e.g.
192.168.10.0/24, if IP network192.168.11.0/24is already in use by your Ethernet LAN.
- In this document, we assume IP network
- Have a wireless client (laptop, smartphone, …) ready to test your new access point.
Install Access Point and Management Software
In order to work as an access point, the Raspberry Pi needs to have the hostapd access point software package installed:
sudo apt install hostapdEnable the wireless access point service and set it to start when your Raspberry Pi boots:
sudo systemctl unmask hostapd
sudo systemctl enable hostapd
In order to provide network management services (DNS, DHCP) to wireless clients, the Raspberry Pi needs to have the dnsmasq software package installed:
sudo apt install dnsmasqFinally, install netfilter-persistent and its plugin iptables-persistent. This utility helps by saving firewall rules and restoring them when the Raspberry Pi boots:
sudo DEBIAN_FRONTEND=noninteractive apt install -y netfilter-persistent iptables-persistentSoftware installation is complete. We will configure the software packages later on.
Set up the Network Router
The Raspberry Pi will run and manage a standalone wireless network. It will also route between the wireless and Ethernet networks, providing internet access to wireless clients. If you prefer, you can choose to skip the routing by skipping the section “Enable routing and IP masquerading” below, and run the wireless network in complete isolation.
Define the Wireless Interface IP Configuration
The Raspberry Pi runs a DHCP server for the wireless network; this requires static IP configuration for the wireless interface (wlan0) in the Raspberry Pi. The Raspberry Pi also acts as the router on the wireless network, and as is customary, we will give it the first IP address in the network: 192.168.11.1.
To configure the static IP address, edit the configuration file for dhcpcd with:
sudo nano /etc/dhcpcd.confGo to the end of the file and add the following:
interface wlan0
    static ip_address=192.168.11.1/24
    nohook wpa_supplicant
Enable Routing and IP Masquerading
This section configures the Raspberry Pi to let wireless clients access computers on the main (Ethernet) network, and from there the internet.
| NOTE | If you wish to block wireless clients from accessing the Ethernet network and the internet, skip this section. |
|---|
To enable routing, i.e. to allow traffic to flow from one network to the other in the Raspberry Pi, create a file using the following command, with the contents below:
sudo nano /etc/sysctl.d/routed-ap.confFile contents:
# Enable IPv4 routing
net.ipv4.ip_forward=1
Enabling routing will allow hosts from network 192.168.11.0/24 to reach the LAN and the main router towards the internet. In order to allow traffic between clients on this foreign wireless network and the internet without changing the configuration of the main router, the Raspberry Pi can substitute the IP address of wireless clients with its own IP address on the LAN using a “masquerade” firewall rule.
- The main router will see all outgoing traffic from wireless clients as coming from the Raspberry Pi, allowing communication with the internet.
- The Raspberry Pi will receive all incoming traffic, substitute the IP addresses back, and forward traffic to the original wireless client.
This process is configured by adding a single firewall rule in the Raspberry Pi:
sudo iptables -t nat -A POSTROUTING -o eth0 -j MASQUERADENow save the current firewall rules for IPv4 (including the rule above) and IPv6 to be loaded at boot by the netfilter-persistent service:
sudo netfilter-persistent saveFiltering rules are saved to the directory /etc/iptables/. If in the future you change the configuration of your firewall, make sure to save the configuration before rebooting.
Configure the DHCP and DNS services for the wireless network
The DHCP and DNS services are provided by dnsmasq. The default configuration file serves as a template for all possible configuration options, whereas we only need a few. It is easier to start from an empty file.
Rename the default configuration file and edit a new one:
sudo mv /etc/dnsmasq.conf /etc/dnsmasq.conf.orig
sudo nano /etc/dnsmasq.conf
Add the following to the file and save it:
interface=wlan0 # Listening interface
dhcp-range=192.168.11.2,192.168.11.20,255.255.255.0,24h
                # Pool of IP addresses served via DHCP
domain=wlan     # Local wireless DNS domain
address=/gw.wlan/192.168.11.1
                # Alias for this router
The Raspberry Pi will deliver IP addresses between 192.168.4.2 and 192.168.4.20, with a lease time of 24 hours, to wireless DHCP clients. You should be able to reach the Raspberry Pi under the name gw.wlan from wireless clients.
| NOTE | There are three IP address blocks set aside for private networks. There is a Class A block from 10.0.0.0 to 10.255.255.255, a Class B block from 172.16.0.0 to 172.31.255.255, and probably the most frequently used, a Class C block from 192.168.0.0 to 192.168.255.255. |
|---|
There are many more options for dnsmasq; see the default configuration file (/etc/dnsmasq.conf) or the online documentation for details.
Ensure Wireless Operation
Note, I successfully skipped this subsection
Countries around the world regulate the use of telecommunication radio frequency bands to ensure interference-free operation. The Linux OS helps users comply with these rules by allowing applications to be configured with a two-letter “WiFi country code”, e.g. US for a computer used in the United States.
In the Raspberry Pi OS, 5 GHz wireless networking is disabled until a WiFi country code has been configured by the user, usually as part of the initial installation process (see wireless configuration pages in this section for details.)
To ensure WiFi radio is not blocked on your Raspberry Pi, execute the following command:
sudo rfkill unblock wlanThis setting will be automatically restored at boot time. We will define an appropriate country code in the access point software configuration, next.
Configure the AP Software
Create the hostapd configuration file, located at /etc/hostapd/hostapd.conf, to add the various parameters for your new wireless network.
sudo nano /etc/hostapd/hostapd.confAdd the information below to the configuration file. This configuration assumes we are using channel 7, with a network name of EnchantedRose, and a password AardvarkBadgerHedgehog. Note that the name and password should not have quotes around them, and the passphrase should be between 8 and 64 characters in length, or else “hostapd” will fail to start.
country_code=US
interface=wlan0
ssid=EnchantedRose
hw_mode=g
channel=7
macaddr_acl=0
auth_algs=1
ignore_broadcast_ssid=0
wpa=2
wpa_passphrase=AardvarkBadgerHedgehog
wpa_key_mgmt=WPA-PSK
wpa_pairwise=TKIP
rsn_pairwise=CCMP
Note the line country_code=US: it configures the computer to use the correct wireless frequencies in the United States. Adapt this line and specify the two-letter ISO code of your country. See Wikipedia for a list of two-letter ISO 3166-1 country codes.
To use the 5 GHz band, you can change the operations mode from hw_mode=g to hw_mode=a. Possible values for hw_mode are:
- a = IEEE 802.11a (5 GHz) (Raspberry Pi 3B+ onwards)
- b = IEEE 802.11b (2.4 GHz)
- g = IEEE 802.11g (2.4 GHz)
Note that when changing the hw_mode, you may need to also change the channel – see Wikipedia for a list of allowed combinations.
Troubleshooting hostapd: If for some reason your access point is not coming up, try running hostapd manually from the command line: sudo hostapd /etc/hostapd/hostapd.conf
You’ll likely get some kind of error message back.
Running the new Wireless AP
Now restart your Raspberry Pi and verify that the wireless access point becomes automatically available.
sudo systemctl rebootOnce your Raspberry Pi has restarted, search for wireless networks with your wireless client. The network SSID you specified in file /etc/hostapd/hostapd.conf should now be present, and it should be accessible with the specified password.
If SSH is enabled on the Raspberry Pi, it should be possible to connect to it from your wireless client as follows, assuming the pi account is present: ssh pi@192.168.11.1.
If your wireless client has access to your Raspberry Pi (and the internet, if you set up routing), congratulations on setting up your new access point!
If you encounter difficulties, contact the forums for assistance. Please refer to this page in your message.
Once this is done, the network should be “EnchantedRose”, and the main web address should be 192.168.11.1.


I can confirm that this method works for Raspbian 11 (bullseye)
I can also confirm success using Bullseye on a pi3.
Thanks for the article. There is no Raspbian “Bullet.” Raspbaian “Buster”, maybe.
thanks! Will fix this typo.