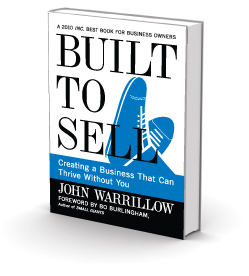
Seattle Citizens Speak Out In Ballard

The Ballard Town Hall meeting on May 2nd 2018 may well be looked back upon as a sea-change moment for the city of Seattle. Many Seattleites like me have grown increasingly fed up with Seattle’s approach to homelessness, increasing taxation, lax law enforcement and general fiscal mismanagement at the City Council.

The Ballard Town Hall was well over an hour long. I’ve pulled twenty-some minutes that summarize the frustration and push-back. These people speak for many citizens:

Feel free to share or embed this video if anyone asks what some of us are so frustrated about.

Please visit KOMO News’s Facebook Feed for the full video.

@KOMO, I hope my excerpts are acceptable under Fair Use, but if not, please jot me a note on Twitter.

Also, readers — please be sure to view this excellent timeline from KIRO7 of the contentious Head Tax issue and the homeless crisis, and a recent story of how we got here.

Seattle Friends: Want Change? Join “Speak Out Seattle!”

Interested in seeing evidence-based solutions? Do you want to at least become more informed on the issues around accountable municipal government, even if you may disagree with individual positions taken? I strongly recommend you…

Join Speak Out Seattle! on Facebook
it’s free to join, free to leave

We need to organize a sensible new coalition of leaders to the City Council. More than just achieving the important Head Tax rollback, we need to start electing sensible, evidence-based moderates to the Seattle City Council who care about fiscal stewardship and evidence-based solutions.

This process begins with more citizens getting an information diet with the full picture, including a full understanding of problems inherent with our current strategy, past problems, and not just the same storyline we’ve heard from present leadership for the past several years about how we should approach municipal governance.

Speak Out Seattle! shares all kinds of information about city governance and gives you advance notice about opportunities to lend your voice.

From Speak Out Seattle’s “About Us”:

Speak Out Seattle! is a non-partisan grass roots coalition of individuals, business owners and neighborhood groups across the city dedicated to speaking out and advocating for effective, compassionate solutions to the challenges our city faces. We seek to make Seattle a better place for everyone. We give voice to those who feel their concerns are drowned out by paid advocates.

Obligatory Disclaimer

As with any group that I’m part of, I cannot endorse everything said or discussed, though I often strongly agree with the positions taken. I find it an informative group; in this age of social media, it’s vital to build an information diet from multiple perspectives. That’s why I also follow all Seattle City Council members on Twitter as well as several centrist, left-of-center and right-of-center news outlets.

Which Seattle Restaurants Have Had the Most Closures Forced by Inspectors?

King County’s Restaurant Inspection Grades, which is based upon the average of red-card violations in the past four inspections

I’m exploring the Python stack for data analysis and machine learning.

I know I’m late to the party, but have only recently discovered the impressive Jupyter Notebook (formerly IPython) data analysis platform and community. It makes “storytelling from data” easy. But doing so with ease requires fluency with a sometimes unintuitive yet very powerful syntax.

Today’s question: Which Seattle-area restaurants have been forced to close the most often by restaurant inspectors?

For this morning’s project, I headed on over to a local Starbucks, tapped into wifi, and downloaded the King County Restaurant Inspection dataset.

King County’s restaurant inspection policies are spelled out here, and violations generally fall into “red” (serious) or “blue” (non-serious) violations. Red violations can and often do result in forced temporary closure of the restaurant.

Now, for this SQL-guy, importing the data file into a database and doing a simple GROUP BY query would make this question easy to answer, but for my Python learning purposes, that’d be cheating. I want to learn a bit about data visualization and pattern recognition.

After a little bit of munging of the data, I came out with the list below, which shows restaurant name and the total distinct closure-worthy moments. Surprising to me that some were such repeat offenders. Really, Anjappar Chettinad? Inspectors forced closure five separate times?

From January 2006 until March 2018, there have been 181 distinct restaurant closures in the Seattle area by inspection.

Some, like Anjappar Chettinad Indian Restaurant, King Buffet and 663 Bistro, have been closed multiple times. You can see that the list of inspection-forced-closures is heavily weighted toward international (i.e., Indian, Chinese, Thai, Vietnamese and Mexican) restaurants, but also includes a few taverns, hot dog street vendors, delis and coffee shops.

Here’s a scatter plot of where these closures have taken place (as you can see, I haven’t yet gotten geo heatmaps sorted out yet — I’ll be exploring folium or other geo-plotters in the future.) But it seems to show that the major areas are South Lake Union and Queen Anne:

Pace of Closures by Year

Let’s see how closures have paced by year (2018 is partial, through mid-March 2018):

Interesting — what’s going on here? Why was 2007–2010 a down-period, particularly 2010? Was that a particularly careful, healthy year? That seems unlikely. Possible explainers: economic effects reducing inspections? Measurements not recorded in the same format? Or was something else going on?

Looking at total inspections by year, we can clearly see that it’s not because of cutbacks in inspections. Here are the total unique inspections (i.e., unique restaurant/date pairs) by year, through mid-March 2018:

So there’s a steady increase in inspections from year to year. Don’t know exactly why 2010 was such a closure-light year, or why 2008–2010 trended down; my current hypothesis is that there was a policy change, or perhaps less aggressive inspections, that made these more lenient.

Distribution of Grades

Just how bad is it, comparatively speaking, when you see a “Needs Improvement”, or even an “Okay” sign? You may have anecdotally noticed that it’s pretty rare when you glance at the door and see one of these two grades. Here’s a histogram — one per inspector visit — and the resultant grades assigned, since 2006 (1=Excellent, 2=Great, 3=Okay, 4=Needs Improvement.)

What I take away from the above is that “Okay” and “Needs Improvement” are real outliers.

For more info, you can check out the King County Restaurant Inspection lookup system here: https://www.kingcounty.gov/depts/health/environmental-health/food-safety/inspection-system/search.aspx#/

https://gist.github.com/stevemurch/ccac0123600cefdc7314d0524a449f8b.js

Restaurants that have an “Okay” Grade as of March 28 2018:

0          ANJAPPAR CHETTINAD INDIAN RESTAURANT
1                                 ARAYA'S PLACE
2                                    BIG BAZAAR
3                                   CASA PATRON
4                                  CHAAT N ROLL
5                                   CHINA FIRST
6                               CROSSROADS CAFE
7                                     FOODSHION
8                                  GALLO DE ORO
9                     GOLDEN INDIAN CURRY HOUSE
10                                   GREEK PITA
11             GREEN LEAF VIETNAMESE RESTAURANT
12                       HALAL MARWA RESTAURANT
13                                   HAWAII BBQ
14    HOMEGROWN SUSTAINABLE SANDWICH SHOP-KIOSK
15                        HUNAN CHINESE KITCHEN
16                              HYDERABAD HOUSE
17                             Hung Long Market
18                              ICHIRO TERIYAKI
19                                   J B GARDEN
20            KING'S CHINESE SEAFOOD RESTAURANT
21                                    LOCAL PHO
22                 LOTUS ASIAN KITCHEN & LOUNGE
23                          LUNCHBOX LABORATORY
24                        MARINEPOLIS SUSHILAND
25                             MIRAK RESTAURANT
26                              Niko's Teriyaki
27                         PABLA INDIAN CUISINE
28                          PEN THAI RESTAURANT
29                                 PHO VIET ANH
30                                    RUBY THAI
31                          SAIGON VIETNAM DELI
32                           SAM'S NOODLE HOUSE
33                           SEOUL TOFU HOUSE 2
34                               SUNNY TERIYAKI
35                         SUSHIMARU RESTAURANT
36                     SZECHUAN CHEF RESTAURANT
37                            THAI CURRY SIMPLE
38                                  THAI ON 1ST
39                          TIENDA LATIN MARKET
40                                  U:DON FRESH
41                                   UDUPI CAFE
42                                      YU SHAN

Restaurant name, total number of red-cards shown below.

More than one red card can and often is handed out per visit — so the number of actual closures is significantly less than the numbers below:

663 BISTRO 57
ANJAPPAR CHETTINAD INDIAN RESTAURANT 53
KING BUFFET 49
SPICED TRULY CHINESE CUISINE 32
ROYAL INDIA 30
UDUPI CAFE 24
SICHUANESE CUISINE 23
MIDORI TERIYAKI 22
OH! INDIA 21
CURBSIDE (KC225) 20
BIG BAZAAR 20
CAFE PHO II, INC. 17
GOLDEN DAISY RESTAURANT 17
ICHIRO TERIYAKI 17
BLUE FIN & SEAFOOD 17
GREEN LEAF VIETNAMESE RESTAURANT 16
BEBAS & AMIGOS 16
TOP GUN OF BELLEVUE 16
YU SHAN 15
BENTO BOX, THE 14
MACKY’S DIM SUM 14
KING’S CHINESE SEAFOOD RESTAURANT 13
HANABI SUSHI RESTAURANT 13
YOKO 3 13
SAIGON DELI 13
TERIYAKI BISTRO 13
FORTUNE GARDEN RESTAURANT 12
J B GARDEN 12
HYDERABAD HOUSE 12
HANAHREUM MART 11
HARBOR CITY RESTAURANT 11
YUMMY PHO 11
MAYURI FOODS & VIDEO 11
KABAB PALACE 10
SEADLE HOUSE 10
SILVER SPOON THAI RESTAURANT 10
SAFFRON SPICE 10
CAFE PHO 10
MEDITERRANEAN MIX 9
KUNG HO GOURMET CHINESE RESTAURANT 9
LA PINA/TRES HERMANOS 9
SEATTLE DELI 9
HONG KONG BISTRO 9
ASIA BBQ & FAST FOOD 9
SEOUL TOFU HOUSE 2 9
CEDARS BROOKLYN DELI 9
HUNAN CHINESE KITCHEN 8
MAHARAJA CUSINE OF INDIA 8
IKIIKI 8
TOULOUSE PETIT KITCHEN & LOUNGE 8
SKILLET STREET FOOD, LLC 8
FEAST 8
SUNNY TERIYAKI 8
MAZATLAN RESTAURANT 8
RANCHO BRAVO TACOS #1 8
LOTUS ASIAN KITCHEN & LOUNGE 8
TAQUERIA GUADALAJARA 8
PALACE KOREAN GRILL 8
LOCAL PHO 7
PARKSIDE DELI & SUNDRIES 7
MIRAK RESTAURANT 7
COUNTRY SIDE CAFE 6
FAMOUS RANDY 6
MUNCH BOSS (KC465) 6
IMPERIAL GARDEN & HAPPY TUMMY 6
13 COINS 6
THAI ON 1ST 6
THAI CHEF 6
SMALL FRYE’S 6
PIONEER GRILL@VARAMINI COMMISSARY 6
MUSTARD SEED CAFE 5
PHO TAI 5
CHU MINH TOFU & VEGETARIAN DELI 5
GRILL CITY 5
NORTHWEST CATERING #9 5
LA RIVIERA MAYA #2 4
GOURMET DOG JAPON 4
JEMIL’S BIG EASY 4
RAM RESTAURANT & BREWERY 4
PEOPLE’S BURGER@VARAMINI COMMISSARY 4
ROMIO’S PIZZA & PASTA 4
TAQUERIA EL ASADERO 4
DONA QUEEN DONUT & DELI 4
DRAGONFISH ASIAN CAFE 4
SAM’S NOODLE HOUSE 4
SAMURAI NOODLE 4
LA PLAYA MEXICAN RESTAURANT 4
HOMEGROWN SUSTAINABLE SANDWICH SHOP-KIOSK 3
HALLAVA FALAFEL LLC 3
N W HASIMO FAST FOOD AND DELI 3
STOPWATCH ESPRESSO 3
MANCHU WOK AT SEA-TAC 3
RACHA NOODLES & THAI CUISINE 3
SUBWAY #25524-O 3
EL CAMION 3
CHUCK E CHEESE’S 3
THAI CURRY SIMPLE 3
BIG BAWARCHI 3
AL’S GOURMET SAUSAGE #5 3
RAIN DOGS SODO, CART #2 3
LANPONI THAI RESTAURANT 3
PHO THU THUY 3
TAQUERIA EL CORRAL #1 2
BEST CORN #1 2
SUNSET FRIED CHICKEN 2
BOUMBA HOTDOG 2
GREAT WESTERN PACIFIC 2
MCDONALD’S SAMMAMISH #5523 2
YUMBIT (KC298) 2
DANTE’S INFERNO (1) 2
CAFE ZUM ZUM 2
MAIN ST GYROS 2
QDOBA #2618 2
HOW TO COOK A WOLF 2
OASIS TEA ZONE 2
Hung Long Market 2
I LOVE MY GFF 2
LUNCHBOX LABORATORY 2
CAFFE BEE 1
BLAZEN (KC547) 1
THAI 2 G0 1
THAI BISTRO RESTAURANT 1
CHIPOTLE MEXICAN GRILL #2228 1
LT’S FAMOUS BBQ 1
QUARTER CHUTE CAFE 1
BISTRO BAFFI 1
OSTERIA DA PRIMO 1
PHI KAPPA SIGMA 1
NEEMA’S 1
BENEVOR, INC 1
BEEZNEEZ GOURMET SAUSAGE (KC287) 1
TOSHI’S TERIYAKI 1
TUKWILA DELI 1
ART MARBLE 21 1
VOXX COFFEE 1
ANGELO’S PIZZA & PASTA 1
7-ELEVEN STORE #2361–27283C 1
WORLD WRAPPS — REI 1
MEDITERRANEAN KITCHEN 1
COWGIRLS ESPRESSO 1
CHURCH’S CHICKEN 1
GERALDINE’S COUNTER 1
RAM RESTAURANT & BIG HORN BREWERY 1
JUISALA 1
KFC #332 1
POTBELLY SANDWICH SHOP 1
KING OF PHO 1
SANDHU SHELL MINI-MART 1
Niko’s Teriyaki 1
HALLAVA FALAFEL 1
Genki Sushi 1
KIRKLAND AMERICAN LITTLE LEAGUE 1
PING’S FOOD MART 1
GARAM MASALA AND SPICES 1
CLASS ACT 1
FULL LIFE CARE 1
FREMONT HOT DOG 1
SUBWAY 1
LA RUSTICA 1
LA VITA E BELLA (KC222) 1
LADYBUG ESPRESSO 1
TACO GOL TAQUERIA 1
CROSSROADS CAFE 1
QDOBA MEXICAN EATS 1
COURTYARD BY MARRIOTT — STARBUCKS 1
COFFEE TIME 1
MARINEPOLIS SUSHILAND 1

Another question: What Seattle Zip Codes have had the most “type red” (serious) violations? I haven’t quite figured out how to display counts on a heatmap just yet, but it turns out the answer is 98109, which includes Queen Anne and South Lake Union:

Note that I haven’t yet divided by inspection frequency, that’s simply the nominal leader. It could certainly be because that’s where more restaurants are, or where more inspections have been scheduled. Will likely take a look at that in a future update.

Comparing Trump and Hillary Clinton on Twitter

I’ve been dusting off my machine learning/data-science skills by diving into Python, which has become a lingua franca (along with R) of the data analysis world. Python’s libraries for data analysis and visualization are really superb and can make quick work of complex data analysis tasks.

Sentiment Analysis

Today, it’s possible to use computers to quantify, with reasonable accuracy, the emotional “sentiment” of an utterance, determining if it is fundamentally positive, negative or neutral in nature. This is called “sentiment analysis,” and is a very fertile area for some really interesting projects.

Looking around for basic topics to put new Python learnings to the test, I thought it’d be fun to take a look at the Twitter sentiment and “virality” of two famous tweeters: realDonaldTrump and hillaryclinton.

Using basic data science techniques, it seemed possible to know answers to questions such as:

  • Which of the two is currently more negative on Twitter?
  • Are Trump’s Twitter followers more “viral” than Clinton’s?
  • Under what conditions do their followers tend to like and retweet their messages?
  • When one of them goes negative, how do their followers respond?
  • etc.

[Update: I’ve just discovered jupyter, which would be the ideal platform to write this up in.]

Caveats

This is only the result of about 90 minutes of work, meant as a fun “throwaway” project to help me learn the frameworks. This is not university-level, peer-reviewed research. There are numerous caveats, and I caution against over-interpreting the data.

The two biggest caveats: First, the problem of Twitter bots is real, and well known. Twitter is fighting them, but it’s impossible to say with the data below just how much that impacts the data. Still, the results of the data below suggests to me that Trump probably has more bots that just retweet and like what he says, regardless of content.

Second, note that I’m using only the most basic “sentiment analysis” library: textblob. This is prone to false positives, as it looks word-by-word and does not accurately measure sentiments in the case of, for instance, double-negatives. This is experimental, and meant solely for learning and fun. Several tests I’ve run across have shown it to only be about 83–85% accurate.

Results

Nevertheless, here’s the result of the analysis as of March 13, 2018, looking at their last 200 tweets:

What jumped out at me

  • Trump has 2.2x as many followers as HRC. OK, duh. We don’t need python for that. But this is important to keep in mind for the table above, so it’s first off the bat. Said another way, if the audiences were relatively equal, you’d expect similar ratios to retweets, likes, and responses to negative or positive expressions.
  • HRC’s followers are significantly more “viral,” on a per-capita basis — they like and retweet on a “per-capita” basis much moreso than do Trump’s. While Trump has 2.2x as many followers, he only has 69% more “likes” from his followers; HRC’s followers are about twice as active, in general in liking/retweeting what she writes. Looking at her last 200 tweets:
  • Trump’s followers are equally likely to RT Trump regardless of whether what he writes is positive, negative or neutral. Another way to think of this is that no matter what Trump says, a sizable percentage of his core followers will retweet it. (One plausible theory — see “bots” above. He may well have more of them.)
  • Note the substantial dropoff of retweets for Trump (and not for Clinton) around the end of February and early March, 2018. One hypothesis (I’ve not yet checked) is that this was due to a purge of bots by Twitter.
Likes and Retweets over Time: Hillary Clinton: Much higher per follower than Trump’s
Likes and Retweets over Time: Donald Trump’s — Steadier Likes, Regardless of content

Most Retweeted Tweet, Trump (in past 200):

Lowest rated Oscars in HISTORY. Problem is, we don’t have Stars anymore — except your President (just kidding, of course)!

Most Retweeted Tweet, Clinton (in past 200):

RT @BillKristol: Two weeks ago a 26-year old soldier raced repeatedly into a burning Bronx apartment building, saving four people before he died in the flames. His name was Pvt. Emmanuel Mensah and he immigrated from Ghana, a country Donald Trump apparently thinks produces very subpar immigrants.
https://twitter.com/BillKristol/status/951637572576477184?utm_campaign=crowdfire&utm_content=crowdfire&utm_medium=social&utm_source=twitter

Code

# General:
import tweepy           # To consume Twitter's API
import pandas as pd     # To handle data
import numpy as np      # For number computing
# For plotting and visualization:
from IPython.display import display
import matplotlib.pyplot as plt
import seaborn as sns
#%matplotlib inline
from textblob import TextBlob
import re
# We import our access keys:
from credentials import *    # This will allow us to use the keys as variables
# API's setup:
def twitter_setup():
"""
Utility function to setup the Twitter's API
with our access keys provided.
"""
# Authentication and access using keys:
auth = tweepy.OAuthHandler(CONSUMER_KEY, CONSUMER_SECRET)
auth.set_access_token(ACCESS_TOKEN, ACCESS_SECRET)
# Return API with authentication:
api = tweepy.API(auth)
return api
# We create an extractor object:
extractor = twitter_setup()
# We create a tweet list as follows:
tweets = extractor.user_timeline(screen_name="hillaryclinton", count=200)
print("Number of tweets extracted: {}.n".format(len(tweets)))
def clean_tweet(tweet):
'''
Utility function to clean the text in a tweet by removing
links and special characters using regex.
'''
return ' '.join(re.sub(r"(@[A-Za-z0-9]+)|([^0-9A-Za-z t])|(w+://S+)", " ", tweet).split())
def analyze_sentiment(tweet):
'''
Utility function to classify the polarity of a tweet
using textblob.
'''
analysis = TextBlob(clean_tweet(tweet))
if analysis.sentiment.polarity > 0:
return 1
elif analysis.sentiment.polarity == 0:
return 0
else:
return -1
# We print the most recent 5 tweets:
print("5 recent tweets:n")
for tweet in tweets[:5]:
print(tweet.text)
print()
# We create a pandas dataframe as follows:
data = pd.DataFrame(data=[tweet.text for tweet in tweets], columns=['Tweets'])
# We display the first 10 elements of the dataframe:
display(data.head(10))
data['len']  = np.array([len(tweet.text) for tweet in tweets])
data['ID']   = np.array([tweet.id for tweet in tweets])
data['Date'] = np.array([tweet.created_at for tweet in tweets])
data['Source'] = np.array([tweet.source for tweet in tweets])
data['Likes']  = np.array([tweet.favorite_count for tweet in tweets])
data['RTs']    = np.array([tweet.retweet_count for tweet in tweets])
# We create a column with the result of the analysis:
data['SA'] = np.array([ analyze_sentiment(tweet) for tweet in data['Tweets'] ])
# We display the updated dataframe with the new column:
display(data.head(10))
# We extract the mean of lengths:
mean = np.mean(data['len'])
print("The average length of tweets: {}".format(mean))
# We extract the tweet with more FAVs and more RTs:
fav_max = np.max(data['Likes'])
rt_max  = np.max(data['RTs'])
fav = data[data.Likes == fav_max].index[0]
rt  = data[data.RTs == rt_max].index[0]
# Max FAVs:
print("The tweet with more likes is: n{}".format(data['Tweets'][fav]))
print("Number of likes: {}".format(fav_max))
print("{} characters.n".format(data['len'][fav]))
# Max RTs:
print("The tweet with more retweets is: n{}".format(data['Tweets'][rt]))
print("Number of retweets: {}".format(rt_max))
print("{} characters.n".format(data['len'][rt]))
# Mean Likes
meanlikes = np.mean(data["Likes"])
meanRTs = np.mean(data["RTs"])
print("Mean likes is {}".format(meanlikes))
print("Mean RTs is {}".format(meanRTs))
# Time Series
tlen = pd.Series(data=data['len'].values, index=data['Date'])
tfav = pd.Series(data=data['Likes'].values, index=data['Date'])
tret = pd.Series(data=data['RTs'].values, index=data['Date'])
# Lengths along time:
# tlen.plot(figsize=(16,4), color='r')
# Likes vs retweets visualization:
tfav.plot(figsize=(16,4), label="Likes", legend=True)
tret.plot(figsize=(16,4), label="Retweets", legend=True)
plt.show()
rts2likes = pd
pos_tweets = [ tweet for index, tweet in enumerate(data['Tweets']) if data['SA'][index] > 0]
neu_tweets = [ tweet for index, tweet in enumerate(data['Tweets']) if data['SA'][index] == 0]
neg_tweets = [ tweet for index, tweet in enumerate(data['Tweets']) if data['SA'][index] < 0]
print("Percentage of positive tweets: {}%".format(len(pos_tweets)*100/len(data['Tweets'])))
print("Percentage of neutral tweets: {}%".format(len(neu_tweets)*100/len(data['Tweets'])))
print("Percentage of negative tweets: {}%".format(len(neg_tweets)*100/len(data['Tweets'])))
# Mean Likes of Positives
pos_tweet_likes = [ tweet for index, tweet in enumerate(data['Likes']) if data['SA'][index] > 0]
pos_tweet_rts = [ tweet for index, tweet in enumerate(data['RTs']) if data['SA'][index] > 0]
pos_likes_avg = np.mean(pos_tweet_likes)
pos_RTs_avg = np.mean(pos_tweet_rts)
print("Mean likes of pos_tweets is {}".format(pos_likes_avg))
print("Mean RTs of pos_tweets is {}".format(pos_RTs_avg))
# Mean Likes of Negatives
neg_tweet_likes = [ tweet for index, tweet in enumerate(data['Likes']) if data['SA'][index] < 0]
neg_tweet_rts = [ tweet for index, tweet in enumerate(data['RTs']) if data['SA'][index] < 0]
neg_likes_avg = np.mean(neg_tweet_likes)
neg_RTs_avg = np.mean(neg_tweet_rts)
print("Mean likes of neg_tweets is {}".format(neg_likes_avg))
print("Mean RTs of neg_tweets {}".format(neg_RTs_avg))
# Mean Likes of Neutrals
neutral_tweet_likes = [ tweet for index, tweet in enumerate(data['Likes']) if data['SA'][index] == 0]
neutral_tweet_rts = [ tweet for index, tweet in enumerate(data['RTs']) if data['SA'][index] == 0]
neutral_likes_avg = np.mean(neutral_tweet_likes)
neutral_RTs_avg = np.mean(neutral_tweet_rts)
print("Mean likes of neutral tweets is {}".format(neutral_likes_avg))
print("Mean RTs of neutral tweets {}".format(neutral_RTs_avg))

Acknowledgements

Thanks much to this informative article by Rodolfo Farro for the jumpstart.

Build Your Own Enchanted Rose Prop (Part II)

Part 1 of this article covers the basic parts list, code, and assembly.

UPDATE (January 2023): I’ve built a version 2.0 of this prop. See “Enchanted Rose 2.0: Raspberry Pi Prop with Falling Petals” for updated instructions. 

UPDATE (April 2021): The Bluetooth shield used in this Arduino-based project is apparently discontinued. If I were to build this project again today, I’d make it a Raspberry Pi Zero W with Headers (or 3B+) based device. Take note on that order page of the adapter cables and power supply you should also get.

The RPi would run a simple Flask (python) server to control the servo motors. I’d attach an Adafruit Servo Motor HAT to do the servo motor control, and then build a simple web application to control the prop. This would eliminate all the Swift Coding involved in the app controller, and allow for much easier building/debugging. I would absolutely use the same drop mechanism. That is, servo motors, spring loaded magnets mounted in a wooden golf-ball sized drawer handle.

To be clear, this updated approach would mean I would not order the Redbear Labs BLE shield nor the Arduino, nor would I futz with the fun but unnecessary iOS app. But nothing prevents you from building a nice one to control a Raspberry Pi based prop!

Now that the Enchanted Rose Prop is nearing completion, I wanted to cover a few final details. Here’s a video of the app and prop in its current form:

Aesthetic Touchup

Some paint and floral tape was used to give the stem a little more rose-like appearance. Still in progress, but you get the idea.

Ring Lights

The ring lights are a Neopixel 1 meter long strip. I cut the strip between the LEDs at roughly the 40 LED mark. Doing so has no effect on the Neopixel, as long as you cut between LEDs.

Big gotcha: These lights only want 5V maximum! I fried the first set by overpowering it. Don’t make that mistake — it’s irreversible.

Stem Accent Lights

I purchased a cheap set of LED lights to add some interest to the stem.

These are powered by their own 3-AA battery pack. I’m sure I could use the same 3 AA-battery pack used by the Neopixel strip, but after frying one of those strips, I chose not to risk wasting another $30 tempting fate. To turn these on and off, an N-channel MOSFET transistor is used, with its gate actuator tied to pin 10 of the Arduino.

Basically, the MOSFET transistor lets current pass through if voltage is applied to the Gate pin (pin 1 in the diagram above.) When voltage on the gate goes LOW, the LED accent lights turn off. When voltage on the gate goes HIGH, the accent lights turn on.

Soundproofing

The servo motors are a little squeaky when moving. I installed some foam sound barriers (ordinary shipping packaging) to help dampen the sound.

Drop Mechanism

The initial approach of using piano wire to move flexible wires up and down worked fine from a dropping standpoint, but it had two distinct disadvantages in practice:

  1. the vertical extension above the bud made it hard to get the upper petals to to look real
  2. the “re-set” procedure was going to be way too hard for young adults to do Did I mention that after I had the prop working for an adult, my wife told me that the crew would be entirely comprised of fifth graders? “Hardening” the prop for fifth grade use for 8 performances in ways such as this was actually the most time-consuming part of the project.

So instead, I revised the attach/drop mechanism, to fishing-line-pulls-a-magnet.

I drilled four holes into a wooden 1 1/2″ golf-ball. Tip: use two drill bits, a small one that goes all the way through (just for the fishing line), and a wider one for the hole where the spring mechanism sits. You’ll want to give the spring something to push against, so don’t go all the way through the wooden ball with the drill, as I mistakenly did.

The key part are rod magnets which are inserted into thread covers and put into a spring:

I later added rubber caps over these magnets (but first drilled a small 6mm hole in the center.) I then hot-glued these caps-with-holes over these magnets. In “normal” state, the magnet protrudes through the caps to make surface contact with the washers inside the petals. When the Servo motor moves, it temporarily (2-3 seconds, programmable delay) pulls the fishing line which separates the magnet from the petal, and then resets it to the normal position. The advantage of this design is that it only uses servo motor power during the drop operation.

Result: TOTAL SUCCESS. Worked flawlessly in production and could even be re-set by kids (though I admit I double-checked pre-show.)

The fishing line is pushed through the (orange) nylon thread cover and a double knot is used to prevent it from pulling through. Then, the rod magnet is inserted, finally that’s inserted into a spring. That subassembly is repeated three more times, and inserted into the four holes in the wooden “bud.” You’ll want to make the exit hole for the fishing line quite a bit smaller than the upper hole, so the springs have something to push against. The only thing that comes through the bottom of that wooden ball is four strands of fishing line, which are fed down into the stem, one to each of the four servos.

The petals have a small metal washer hot-glued to the base, which is magnetically attached to the bud. When the servo motor turns, the rod magnet is pulled down about a half inch to an inch into the chamber, and this action causes the petal to fall. The servo motor returns to “slack” position and the spring returns the rod magnet back to its ready position.

The petals can then be reattached.

This drop mechanism is much more durable, and now that the magnets are “self-resetting”, I’m thinking of switching the slider-control based drop mechanism to a simple push-button interface.

(Update: I did so, and those changes are reflected in the Github code. It’s a simple four-button interface for the drop mechanism, one for each petal; this initiates a retraction of the servo, a pause for a second or so, and then restoration to the ready position.)

Epilogue

The performances— all eight showings — were smashing successes!

Izzy, the fifth-grade prop controller, did a great job controlling it and the prop functioned just as designed.

Izzie and The Rose Prop

If there was a flaw, it was that one of the petal drops (of the 32) worked but got hung up on the LED light bush below it, so it appeared not to drop, but that was pretty minor and not a big deal.

Note that I did decide to replace the full set of AA batteries in the entire prop after the fourth performance. I can’t speak to whether that was unnecessarily premature, but there were no battery failures. Each performance was about 90 minutes, and the power to the prop was turned on about a half hour before and after each performance.

The Enchanted Rose Prop is now in the hands of the school theater director (and computer tech teacher; she’s one and the same) as a partial thank-you for all her great work with the kids.

Build Your Own Enchanted Rose Prop

NOTE: There’s a version 2.0 of this project! Follow this link for information on Enchanted Rose 2.0.

My daughter is in Beauty and the Beast this spring. So I thought it’d be a good opportunity to test my Internet of Things (IoT) skills using Arduino, Bluetooth and iOS, and build a remote-controlled Enchanted Rose prop which has variable-color lighting and can drop petals on cue. I contacted the director, volunteered to make the prop, and she was all for it. Read on to see how you too can construct one of these.


UPDATE September 2022: Enchanted Rose 2.0

The plans which follow are version 1.0, based on Arduino, Bluetooth, and a dedicated iOS app written in Swift to control the prop. But the Bluetooth shield in this project has since been discontinued, and the iOS app, while nice and functional, is hard to distribute to others and troubleshoot. Apple is constantly upgrading (breaking compatibility) for its Swift programming language, making it a headache to get running on each instance. 

In the roughly 4 years since I published this piece, I’ve heard inquiries from multiple production managers (UK, CA, CO, NY and more) who want to acquire or rent such a prop. Rather than continue with support on this, I’m building a newer version which will be available for rent.

That of course also means the new design must be shippable, not as delicate as this version 1.0 design is. The 1.0 design is being tossed; the 2.0 design will employ a web server powered by a Raspberry Pi.

Follow me on Twitter to see when the version 2.0 is available (ETA early October 2022.) If you’d like to rent the 2.0 version of the prop, reach out, and please include your production date and ship-to address, and we can discuss. 

So, to summarize: While version 1.0’s design described in this two-part blog series might help guide you in building your own remote-control Enchanted Rose, it employs a few parts and software components that are no longer available. I cannot provide any tech help on the Swift control app, as there are just too many idiosyncracies and configuration issues. The 2.0 version I’m building at present is a different design, based on a Raspberry Pi controlling solenoids to drop the petals. This approach will be far more durable for shipment, and should be plug-and-play for any production.

Now back to the 1.0 article.


This is a two-part article. Lessons are learned along the way, so be sure to read the complete two-part article (Part II here) before proceeding and/or sourcing parts. Some of the design decisions were changed in final implementation; this is more in narrative form with learning lessons along the way.

Part 1 : Basic Prop Setup

At this writing, the vast majority of the prop is working, but it’s not yet fully finished. Some aesthetic touches remain. The performances are still a couple months away, so I’ll be updating this post as the project nears completion.

Here’s a demo of the project in its current stage. This stage uses a v2 mechanism to drop the petals.

Figuring out the best petal-dropping mechanism was actually the most time-consuming part of this project. I found it relatively easy to get an app to control servo motors using Bluetooth, but the question is — how to do you translate servo-motor turns into petal drops?

I originally started out with the idea of stiff piano wire, attached to servo motors in the base moving up and down and the petals having small cocktail straw segments hot-glued to them. This worked, if the prop was set perfectly.

But for various safety reasons (and especially after my wife reminded me that a fifth-grade crew was going to be operating and re-setting this prop), I switched to a version 2.0 design of tiny rod magnets mounted on springs in the “bud,” pulled by fishing line connected to the servos.

There’s a parts list and notes below, with links to the complete source code. Hopefully this this may help other performances that might have this same prop need.

The prop has three basic components:

  • Physical Prop (Rose and Dome)
  • Control App (iOS)
  • Arduino Microprocessor Software

The app “speaks” to the prop via Bluetooth, ably powered by this BLE Shield from Red Bear Labs:

UPDATE (November 2019): I believe the above model, which I used in this project, is now discontinued. If you insist on sticking with Arduino and Bluetooth, you might try other Bluetooth shields, like this one: https://www.adafruit.com/product/2746. You can see a demo of this shield in action here: https://www.youtube.com/watch?v=5ZQ5JJTwONcYou will have to adjust the Swift code included in this blog post to include the new board-specific libraries. Swift has changed considerably since the release of this article. That’s in part why I’d recommend you consider a Raspberry Pi – Wifi approach rather than and Arduino/Bluetooth/iOS-app approach. 

In addition to servo motors which control the falling petals, it has a variable-color LED-strip for optional magical effects on cue:

Parts List, v1.0

  • Display dome (“cloche”) with wooden base
  • 2–3 large Silk roses (will cannibalize some to get petals)
  • Arduino MEGA — While an UNO will work just fine if you don’t want the Neopixel accent light, I chose a MEGA here because the NeoPixel and BLE shield together don’t supply enough available pins to control 4 separate servo motors. (UPDATE April 2021: I’d opt for a Raspberry Pi Zero W, since it can speak WiFi and run Python and small websites.)
  • Wood for base: 3 12×12″ thin plywood sheets, 1 2 foot segment of 1×1
  • 3M Mounting Tape and hot glue gun
  • Coffee straws (if you stick with version 1 design), OR four small rod magnets, 1 1/2″ wooden ball and metal washers (if you use version 2 design)
  • Electronics “breadboard” and jumper wires
  • 17 AA batteries, yes 17. You’ll need 3 for the Neopixel lighting strip (and no more!), 8 to power the servos, and 6 to power the Arduino & BLE Shield. If you want to be fancy, I’m sure you could use a regulator to get from the 9V down to the 5V for the Neopixel, but after frying one of them, I wasn’t interested in risking it.
  • 3-AA battery case (1)
  • 6-AA battery case (1)
  • 8-AA battery case (1)
  • Red Bear Labs Bluetooth Low Energy (BLE) shield see note above – discontinued; you’ll most likely have to use a different BLE shield (Update April 2021: Not needed if you go with the Raspberry Pi approach, since the communication from controller to prop would be via Wifi.)
  • Adafruit NeoPixel strip (60 LEDs, 1 meter)
  • 18″ Aluminum tube
  • 4 springs, about 1/8″ diameter by 1 1/2 inches — not too stiff. I purchased my springs from a local hardware store; the spring from inside a ballpoint pen might also work as well.
  • 4 silicon/rubber thread covers
  • High-strength (e.g., 60lb) fishing line
  • 4 servo motors (Update April 2021: With a Raspberry Pi Zero W approach, I’d definitely opt for a motor controller board, since controlling servos via software on the Raspberry Pi ends up with all kinds of timing issues and motor jitter; you really want a piece of hardware to take control of the Pulse Code Modulation. The right board for the job is this one by Adafruit.)
  • 1000 mu capacitor
  • 300 ohm resistor
  • Sound baffling and/or black felt curtain for the base
  • (optional) 3 toggle switches for power — alternatively, you can just remove a battery from each pack
  • Soldering iron and solder

Physical Prop

What actually causes the petals to drop are four servo motors located beneath the base. They move string that temporarily pulls down a spring-mounted magnet through the stem. This breaks a magnetic connection between the magnet and a washer hot-glued to the petal, causing petals to drop. After a second or two, the servo motor returns to its normal position (with the spring resetting the magnet to being just 1mm proud of the hole).

Use a vise to hold the ball before drilling through. Also, drill with two different sizes of drill bits — be sure to make bottom holes much smaller than top holes, to give something for the springs to rest & push against, so the springs cannot fall through

Dry-fit test, before fishing line was passed through the orange nylon thread cover

To assemble, find the exact center of the dome’s base, and drill a hole just large enough for the aluminum tube. Build a supporting structure which goes under the base, which consists of a shelf for the servos and room for the electronics underneath. Next, affix the servos to the “servo shelf” — I used wall mounting tape from 3M for this purpose. Run piano wires from each servo up through the aluminum “stem.”

The original design was to have the petals attached to the wire by means of small straw segments. When the piano wire withdrew 1/2″ or so into the tube, the petals should fall.

While this simple mechanism worked, I found it was extremely difficult to “reset” for every performance with the wires bunched so tightly together at the flower.

So the final version uses the spring-loaded magnet technique, which works great. Take the silicon/rubber thread covers, drill a very tiny hole in the bottom, thread high-test fishing line through, and tie a double knot at the end. Then, push the rod magnets into the thread covers, and thread the thread covers into the springs, as shown above.

Small metal washers are then hot-glued to individual petals. When the fishing line is pulled by the servo, the magnet withdraws into the stem and separate from the washers on the petals, causing the petals to fall off.

An electromagnetic way of attaching/dropping petals would also work, but for pragmatic reasons, I didn’t pursue that approach: the performance is 1–2 hours long, and I worried about the batteries giving out before the cue. With the magnet and fishing line approach, the petals can stay attached without power.

Control App (iOS)

  • Written in Swift 4 (XCode) and published straight to the device.
  • You’ll need a Mac and the IDE XCode (free at this writing). You do not need a developer program license, since you’ll be publishing the app straight to your iOS device (works with both iPhone and iPad.)
  • You can get the source code from Github here: https://github.com/stevemurch/EnchantedRoseBLE
  • This source code requires you to install the CocoaPod for the color picker. As with all Cocopod-based projects, you’ll need to open the .xcworkspace file, NOT the standard project file, to get the app to compile.
  • This source code assumes that your servos are linked to pins 2, 3, 5 and 6.

Arduino Software for the Microcontroller

Gotchas

  • You will RUIN your $35 Neopixel strip if you accidentally power it with more than 5V! I learned that lesson the hard way; in my haste I wired in the Neopixel strip to the 12V power rail being used for the servos. That permanently fried the light strip instantly. Don’t do that. Instead, create another 4.5V power rail, using 3 (and only 3) AA batteries. The Neopixel strip is awesome, but very sensitive to too much voltage. Be sure to read the Neopixel documentation that shows how to wire in a 1000 mu capacitor and 300 Ohm resistor.
  • The servo motors however require much higher voltage to operate smoothly (12V.) So I powered these entirely separately, using a separate power rail on the breadboard. Make sure you wire the common grounds together, and both back to the Arduino.
  • The Neopixel documentation suggests you power on the Arduino before powering on the Neopixel. So we’ll be powering up in the following order: (1) Board, (2) Servos, (3) Neopixel, (4) Launch app. If you fail to do it in that order, the app might try to connect before a signal is available from the prop and timeout. Simply relaunch the control app and it should discover the device.
  • Connection is excellent, and works through walls and for more than 40 feet. If connection is lost, simply restart the app.
  • It turns out there is a known conflict between the Neopixel strip and servo motors (has to do with timing/interrupts). The fix involves using a custom servo library which limits the Uno to just two servos. So, I decided to upgrade to an Arduino MEGA to get more servo ports. I also used the custom library for servos located here: https://learn.adafruit.com/neopixels-and-servos/the-ticoservo-library
  • This source code assumes that your servos are linked to pins 2, 3, 5 and 6 (note: there’s no 4), and that your Neopixel control pin is 7. All are digital pins.

Basic wiring diagram — note the batteries are just representative; each source has different voltage requirements.

Wiring (BLE Shield not shown, but it’s plugged into Arduino board)

At current writing, all servos and lights work, including the ability for stage crew to set the lighting color. I’m now working on improving the physical petal dropping, by making it easier to re-set (done, and Github code reflects that.) UX changed slightly from the screen below — I changed it to four pushbuttons, one for each petal.

App Screenshot

Servo shelf on top, electronics below. The servo shelf is doughnut-shaped.

Version 1.0 of Petals. I didn’t think this method will be easy for a stage-crew to re-set, so I switched to magnets and hot-gluing small metal washers to the petals.

Physical Prop (in progress — leaves and petals will be attached to stem, and perhaps the stem will be bent.)

Read more… Part II: Finishing Touches